A step-by-step guide
Welcome to our cozy corner of the crochet world! Today, we’re diving into a fun and rewarding project – crocheting your own winter hat. Whether you’re a beginner or an experienced crocheter, this guide will help you create a warm, stylish hat perfect for the chilly months.
Materials Needed:
- Yarn: Medium weight yarn (wool or acrylic) in your choice of color.
- Crochet Hook: Size H/8 (5mm).
- Additional Tools: Yarn needle, stitch markers, scissors.
Skill Level: Beginner-friendly
Pattern Overview:
We’ll be creating a classic beanie-style hat, ideal for keeping you warm and toasty. This pattern is great for learning basic crochet techniques and can be easily customized to fit your style.
Step-by-Step Instructions:
1. Starting the Hat:
- Begin with a slip knot.
- Chain 4 and join with a slip stitch to form a ring.
- Chain 2 (counts as the first half double crochet), then work 11 half double crochets into the ring. Join with a slip stitch to the top of the first chain 2.
2. Working the Body of the Hat:
- Round 2: Chain 2, then work two half double crochets in each stitch around. Join with a slip stitch.
- Continue increasing in this manner for a few rounds, then work even (one stitch in each stitch) until the hat measures about 7 inches from the crown.
3. Shaping the Crown:
- Start decreasing by skipping every other stitch, reducing the number of stitches per round.
- Continue decreasing until the opening is small enough to close.
- Fasten off, leaving a long tail. Thread the tail through the remaining stitches and pull tight to close.
4. Finishing Touches:
- Weave in all ends with your yarn needle.
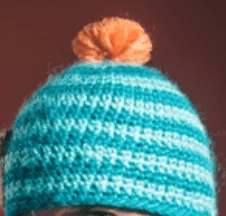
- Optional: Add a pom-pom on top or create a ribbed brim by picking up stitches around the edge and working a few rounds of ribbing (alternate front post and back post double crochets).
Tips and Tricks:
- Maintain even tension for a uniform look.
- Customize your hat with different colors, stripes, or by adding a furry pom-pom on top.
