A Step-by-Step Guide for Beginners
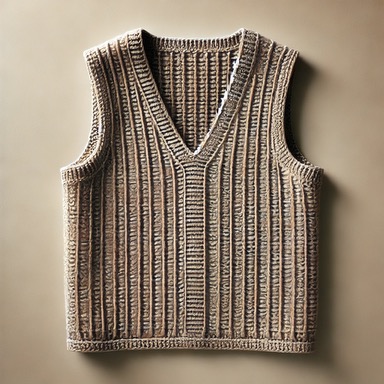
Crocheting a vest is a fun and creative way to craft a stylish addition to your wardrobe. Whether you’re new to crochet or an experienced crafter, making your own vest is a rewarding project that allows you to customize fit, colors, and design. In this guide, I’ll walk you through the basics of crocheting a simple, cozy vest that you can wear year-round.
Materials You’ll Need:
- Yarn: Choose a yarn that suits the season and your style. For a lightweight, summery vest, use cotton or bamboo yarn. For a warm winter vest, opt for wool or acrylic. A medium-weight (worsted) yarn is a great choice for beginners.
- Crochet Hook: Match the hook size to your yarn. A 5.0mm (H-8) hook is usually recommended for worsted-weight yarn, but check the label on your yarn for guidance.
- Scissors: For cutting the yarn.
- Tape Measure: To ensure accurate sizing.
- Tapestry Needle: For weaving in the ends.
Step 1: Measuring and Sizing
Before you begin, you’ll need to take some measurements to ensure the vest fits correctly. Measure the widest part of your chest and the length from your shoulder to where you’d like the vest to fall (usually the waist or hip). You’ll also need to decide on the style—do you want a loose, draped vest or something more fitted? Adjust the number of stitches accordingly.
Step 2: Crochet the Back Panel
Foundation Chain:
- Start by making a slip knot and chain a number of stitches that matches the width of your back panel. For example, you might chain 60–70 stitches, depending on your size and the yarn you’re using.
- Make sure the chain is long enough to stretch across your back.
Row 1:
- After completing your chain, work a single crochet (SC) or double crochet (DC) in the second chain from the hook, and in each chain across. Chain one (for SC) or two (for DC) at the end, and turn your work.
Continue Crocheting:
- Keep crocheting rows until the back panel reaches the desired length (usually from the shoulder down to your waist or hips). Keep the edges as straight as possible.
Finish the Back Panel:
- Once you’ve reached the length you want, fasten off your yarn and leave a long tail to weave in later.
Step 3: Crochet the Front Panels
Foundation Chain:
- For the front panels, you’ll need two separate pieces that are about half the width of the back panel. Start by chaining half the number of stitches you used for the back panel.
Crochet the Front Panels:
- Work in the same stitch pattern (SC or DC) as you did for the back, keeping the front panels straight along the edges. When you’ve reached the desired length, fasten off.
Shaping the Neckline:
- For a V-neck vest, begin decreasing stitches as you near the shoulder. To decrease, simply skip one stitch at the beginning or end of the row. Continue until the front panel has the same length as the back panel.
Step 4: Assembly
Sew the Shoulders:
- Use a tapestry needle and yarn to sew the tops of the front panels to the back panel at the shoulders. Make sure to leave enough space for your head to fit through.
Sew the Sides:
- Align the sides of the front and back panels and sew them together, leaving armholes. If you want a looser fit, leave a larger opening.
Step 5: Adding the Finishing Touches
Crochet the Armholes:
- To give the armholes a clean finish, crochet a round of single crochet stitches around each armhole. This will also help reinforce the edges and prevent fraying.
Add a Border:
- For a polished look, crochet a border around the entire vest. A single crochet border works well, or you can get creative with a decorative edging like a scallop or picot stitch.
Add Buttons (Optional):
- If you’d like to add buttons, sew them onto one of the front panels. You can create buttonholes by skipping a few stitches in the corresponding row of the other panel.
Step 6: Weave in Ends and Block
- Weave in any loose yarn ends using your tapestry needle.
- Blocking the vest is optional but can help even out stitches and give your garment a professional look. Simply dampen the vest and lay it flat to dry, shaping it as needed.
Conclusion
Congratulations! You’ve crocheted your very own vest. This project is perfect for layering in cooler months or as a stylish accessory for warmer days. As you gain more confidence, feel free to experiment with different stitch patterns, colors, or even embellishments like pockets or fringe.
Crocheting is not just a craft, it’s a way to express creativity and make something truly unique. With a little patience and practice, you’ll have a beautiful handmade vest to show off your skills!
