A fun thanksgiving craft!
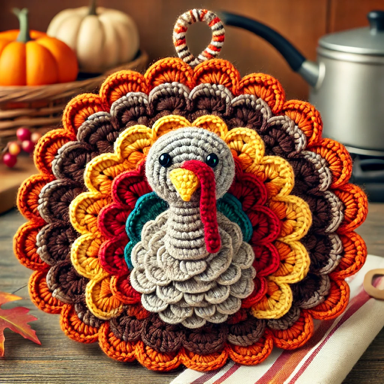
Thanksgiving is around the corner, and what better way to add a festive touch to your kitchen than with a turkey-shaped pot holder? This project is both functional and decorative, making it a delightful addition to your holiday setup. Here’s how to crochet your very own turkey pot holder.
Materials Needed:
- Worsted weight cotton yarn in brown, orange, red, yellow, and white.
- Crochet hooks (size G/4.0mm or size appropriate for your yarn).
- Scissors.
- Yarn needle.
- Stitch markers (optional).
- Heat-resistant batting or double layers of cotton yarn (if using as a functional pot holder).
Steps to Crochet the Turkey Pot Holder
- Create the Body • Start with brown yarn.
• Crochet a magic ring and work 8 single crochets (sc) into the ring. Pull tight and join with a slip stitch (sl st).
• Increase each round by adding stitches: Work 2 sc in each stitch for the second round (16 sc), 1 sc in the first stitch and 2 sc in the next for the third round (24 sc), and so on, until the circle is the desired size for your pot holder (around 6–7 inches in diameter). - Add Feathers • Use autumn colors (red, orange, yellow) for the feathers.
• Attach one color at the edge of the body.
• Chain 5 and slip stitch into the next stitch to form a loop. Continue this around the edge to create a base for feathers.
• For each feather, work into the loops: sc, half-double crochet (hdc), double crochet (dc), hdc, sc. Repeat for all loops. - Make the Turkey’s Head • With brown yarn, crochet a small oval for the head:
• Chain 4, then work 2 sc in the second chain from the hook, 1 sc in the next, and 4 sc in the last. Continue around the other side of the chain with 1 sc and 2 sc in the final stitch. Join with sl st.
• Add eyes with white and black yarn, a yellow triangle for the beak, and a red chain loop for the wattle. - Assemble • Sew the head to the top of the body using a yarn needle.
• Attach a small loop at the top for hanging. - Add Heat Protection (Optional) • If you plan to use the pot holder, sew heat-resistant batting or an extra layer of cotton yarn onto the back.
Tips:
- Use tight stitches to make the pot holder sturdy.
- Personalize the turkey’s colors to match your kitchen theme.
- If you’re a beginner, stick to basic stitches and simplify the design.
This turkey pot holder is perfect for Thanksgiving dinner prep or as a thoughtful handmade gift. Happy crocheting, and enjoy the festive season!
